Your site is now up and running, wearing the theme you dressed it in. The next thing you need to do is hide it while you populate and customize the site. This is as good a time as any to install some essential plugins.
Plugins are the tiny apps that give your site more functionality than WordPress offers “out of the box.” Most of the cool features you see on websites are powered by plugins.
And although it’s true that badly coded plugins can conflict with others, that is no reason to fear them. If your site shows issues after activating a new plugin, deactivate it to identify the problem, and delete if necessary.
My rule is that if you can’t make a plugin or widget work within an hour, ditch it and find another.
Remember that Plugins are for your pages, Widgets are for your sidebars. They both come in through the plugin uploader, but Widgets are described as “widgets.’
Choosing Plugins
To chose Plugins and Widgets, read the description and make sure the version is:
- Compatible with your WordPress version
- Recently updated within the past year
- Highly rated with at least four stars
- Widely downloaded
- Favorably commented in support forums
- Not known for conflicts
Configure Plugins
Widgets mostly keep their settings in Appearance>Widgets. But because Plugins go on the page, their settings are kept elsewhere and can sometimes be confusing to locate.
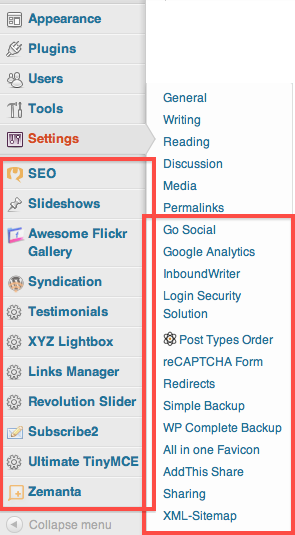
Plugin settings pages land either in Settings, under Permalinks, or under Settings as part of the navigation column.
Or else, the Plugins settings will land near the element it was programmed to help. Or, it can land on the Installed Plugins page. You just have to find the settings pages and configure them.
Some plugins require interfacing with the developer or the media you are connecting to using an API key or special apps, and will walk you though that configuration.
Essential Plugins
Maintenance Mode
Getting back to my point about the first plugin you need to install, one that will cloak your site while you build it, get into Maintenance Mode.
Go to Plugins>Add New and search for Maintenance Mode. Try Ultimate Maintenance Mode. With a plugin like that enabled, the site can only be viewed when logged in.
Jetpack
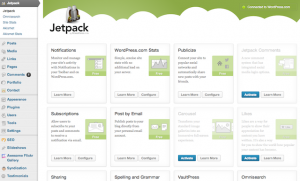
Jetpack is a suite of plugins that “supercharges your self-hosted WordPress site with the awesome cloud power of WordPress.com.”
By opening a free account with WordPress.com and connecting with it, you will not only receive on-site traffic stats, but also a lot of useful plugins and widgets. Among the most useful to me areSubscriptions to gather email addresses and send new post alerts, Publicize and Sharing to connect with social media on new posts, but there are lots more tools to build with. Well worth accessing before looking farther afield.
Backup
Even if your site is empty you might as well have a backup plugin installed. I use WP Complete Backup even though it’s not well rated and is outdated. It works for me.
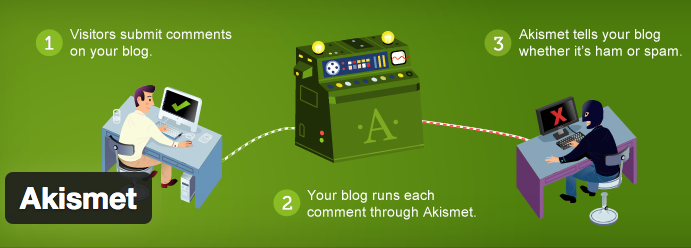 Akismet
Just because you don’t have posts, doesn’t mean spammers won’t try leaving spammy comments on your site. Get thee to Akisment to kill spam dead.
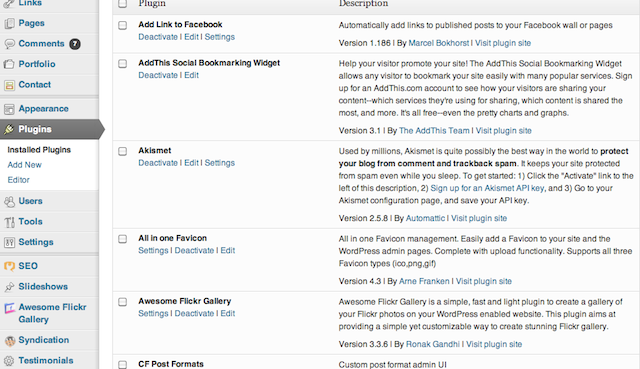
Here is a recent list of my favorite plugins.
But as the Cat in the Hat once said, “That is not all, oh no that is not all.” There will be more plugins to install as you populate your site, which I’ll cover next week.
Meantime, I’d love to know if this series, Create a WordPress Website, is helpful to you.
