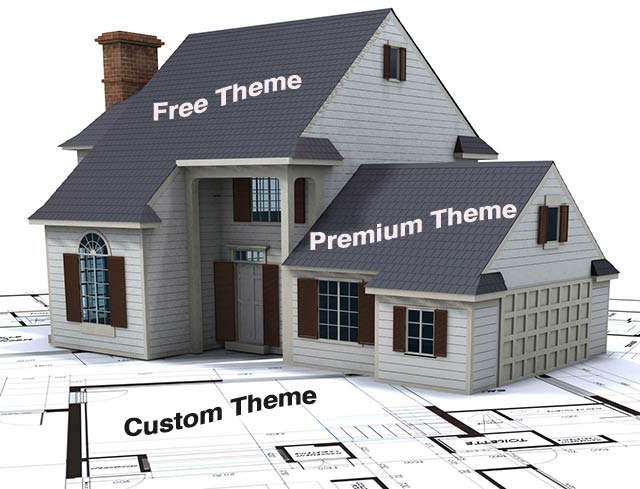
 If installing a new WordPress theme is like buying a house, then building a site is like moving into that house. Suitcases full of photos, videos, text, graphics have to be uploaded and put away. Infrastructure needs to be set. So much to do. Where to start? Like moving in, some people are more organized in their WordPress build than others. Obviously, the more preparation the better, but some things should be done immediately, like…
Don’t panic!!!!!
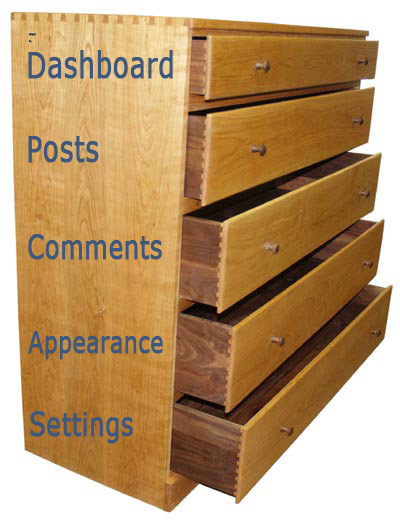
Know that WordPress is very forgiving. It’s hard to break the theme, and when you do, your data is safe. WordPress also saves your Revisions to restore if you mess up. The second thing to do is familiarize yourself with the Dashboard’s navigation menu, which I liken to chests of drawers. Top chest – from Posts to Comments – is all about content. The fun stuff. The bottom chest – Appearance to Settings – is full of tools to help you control the look and functionality of your site. The key to understanding your new WordPress install is learning where everything goes. Before doing anything else, this is what you need to do to build a site.
Settings General
Here is where your most essential information is entered. Your Site Title gets entered in title case, as does your Tagline, or slogan. Don’t muck with URLs. Change your email as needed. You can disallow membership registration on this page, which is advisable.
Settings Reading
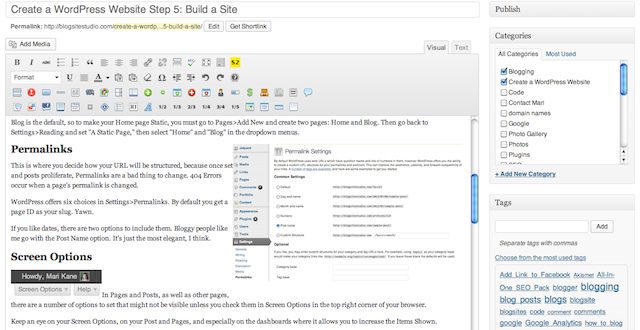
This is almost more important than General as it establishes what the home page does. Decide now if you want your blog posts to be seen first on the front page or if you want Home be a static page, like an olde-fashioned web site. This is your first big decision to make. Blog is the default, so to make your Home page Static, you must go to Pages>Add New and create two pages: Home and Blog. Then go back to Settings>Reading and set “A Static Page,” then select “Home” and “Blog” in the dropdown menus. 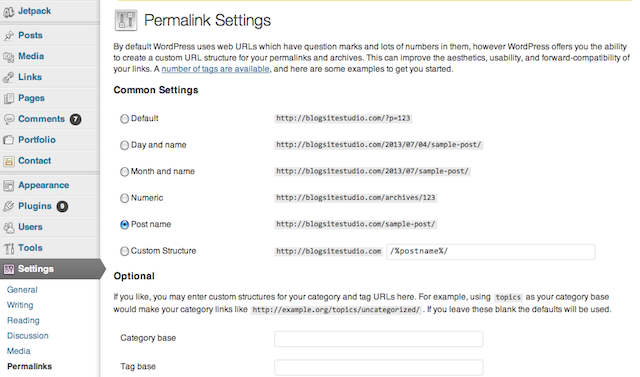
Permalinks
This is where you decide how your URL will be structured, because once set and posts proliferate, Permalinks are a bad thing to change. 404 Errors occur when a page’s permalink is changed. WordPress offers six choices in Settings>Permalinks. By default you get a page ID as your slug. Yawn. If you like dates, there are two options to include them. Bloggy people like me go with the Post Name option. It’s just the most elegant, I think.
Screen Options
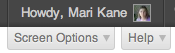 In Pages and Posts, as well as other pages, there are a number of options to set that might not be visible unless you check them in Screen Options in the top right corner of your browser. Keep an eye on your Screen Options on your Post and Pages, and on the dashboards, where it allows you to increase the items viewed. Check every option you want available.
Import files
If you previously had a blog on another platform you can export it as an XML file and import that into WordPress. In Tools, you’ll find options to install plugins to help you import and/or export. Be sure to export all content. Hopefully, all the files will find their places.
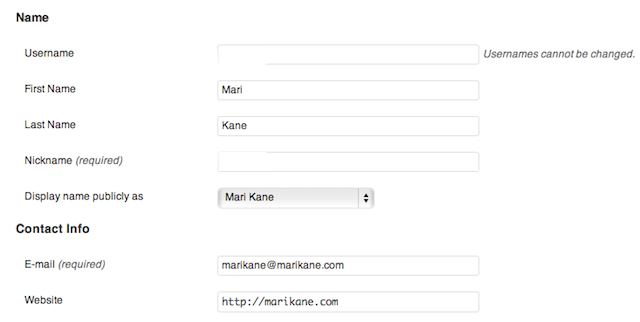 User Profile
Here is where you set how your name is seen publicly. In User>Your Profile if your username is set Admin, it will look awkward in your posts, as well as attract brute force attacks. Get rid of that Admin user name immediately. Here’s how and why. After deleting the Admin’s account, fill in your first and last name and select a version of your names in the drop-down menu. That setting will appear in the Author dropdown on your posts and pages. You can also change your password in Your Profile.
Settings Discussion
Most people who build a site are not thinking about getting comments while working on the site. But being unfinished won’t stop spam bots from registering as users and start leaving spam. You have already disallowed registration in Settings>General. Now, go to go to Settings>Discussion and make your choice on how you want people to comment.
Logo
Find the Logo Upload field in Appearances>Header, upload your gif or jpeg or png file, and tweak. Or upload it in your Theme Options under Header. Lacking a logo, the Title and Tagline in Settings>General will populate your header.
Pages
Add text to your static Home page, but don’t bother with the page, Blog, as it will populate when you add Posts. Go to Pages>Add New. Give your page a title using either conventional titles – About, Contact, Products – or make it keyword rich with words you’ll use on the page. Save Draft. See that the Permalink beneath the Title is the way it should be. Copy and paste your text into the Edit box. If the paragraphs are too far apart, go back to the word doc and find and change ¶¶ to ¶. Paste in the condensed text and it should look perfect. Be sure to click on the Kitchen Sink tool to see all your formatting tools.![]() With formatting revealed, give your text some H2 and H3 tags. Search bots love H2 tags. Check your Page Attributes to see if what page templates are available, and play with them. Check your Screen Options in the upper right corner to make sure all the features are checked and visable below the edit box. Note the difference between Visual and Text. Text is is code.
With formatting revealed, give your text some H2 and H3 tags. Search bots love H2 tags. Check your Page Attributes to see if what page templates are available, and play with them. Check your Screen Options in the upper right corner to make sure all the features are checked and visable below the edit box. Note the difference between Visual and Text. Text is is code.
Posts
The difference between Posts and Pages is that Pages are static while Posts appear in reverse chronological order. Editing them is basically the same, but unlike Pages, Posts contain Categories and Tags, which are very important to the organization of your content.
 Categories
After editing your Post, add a Category to your Post. Categories rule your content and allow the site to corral stories, so readers can find related information. For a music site, some categories might be Rock, Jazz, Classical, Hip-Hop.
Tags
Tags are more specific than categories. On the music site they might include guitar, piano, Jay Z, Coachella. Most Used Tags collect in a tag cloud for easy of re-use. Both Categories and Tags can be added on the fly on the Post page, or organized on their respective Dashboard pages at Post>Categories, and Post>Tags. Remember: with WordPress, there are at least two methods of accomplishing the same task.
 Media
Media
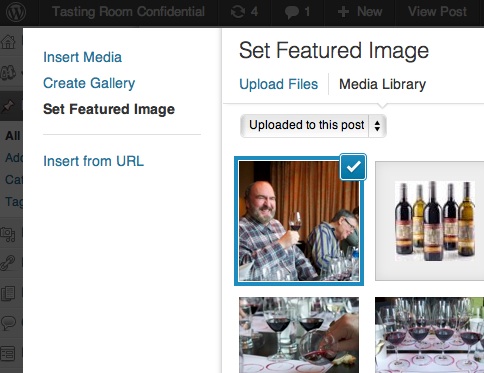
Photos, videos, audio and text files get uploaded into the Media Library. Do this either by going through Media>Add New or by clicking Add Media on your Post or Page. Either way, click install, browse for your file and upload. If done through the Post or Page, you are presented with WordPress’s new Media Manager, which presents all images as thumbnails. Clicking on an image reveals its Attachment Details and Display Settings – but only in Insert Media. What’s nice about the new Media Manager is how it allows you to control Insert Media (on the page) Create Gallery and Set Featured Image from one interface. Here’s more about the Media Manager.
Menus
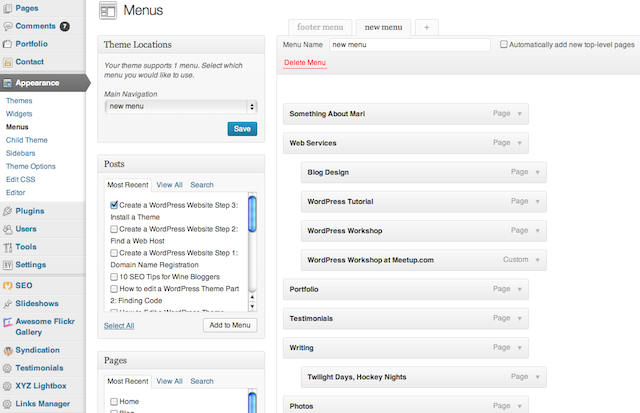 Finally, organize your navigation bar. If you don’t, WordPress will add every one of your pages in the order of their creation. Go to Appearance>Menus. Create a new menu and hit Save Menu. See the Main Navigation drop-down menu under Theme Locations become activated. Chose your new menu and hit Save. Check your Screen Options to make sure all the post types are available. To add menu items, check all the Posts, Pages, Categories, and Tags you want by simply hitting Add to Menu. Those items appears in the middle of the page. Drag your menu items up and down to reorder them. Drag an item to the right to make it a drop-down from the item above it. Menu Items can be opened and the Navigation Label edited without changing the source. Play around with them. Menus are fun. Other things you can do to dress up your site include adding colors to different elements, adding a background image or color and arranging widgets in your sidebar. Here are more tips to get you started as you build a site.
Next Steps
In Step 6, we’ll dig into the fundamentals of blogging as well as keyword usage. Here’s something to read before then. Until then, if you have any questions, please let me know.

Related articles

 7 Clean and Inspiring WordPress Admin Themes
 WordPress Site Builder Software Package

