
If you want to sell stuff on your WordPress website, the hands-down accepted practice is to use WooCommerce. Not only does it work extremely well, and is supported by the folks at WooThemes – makers of this theme – WooCommerce is also completely free.
For new users of WooCommerce, here is a start-up tutorial written by Saud Razzak, the WordPress Community Manager at Cloudways.
I’ve recently begun to work with Cloudways and am in the process of migrating this site in their cloud server. They offer managed VPS hosting at an affordable rate and I was impressed with their awesome 24/7 support.
If you read my post about Web Hosts Recommended by Advanced WordPress Group and wonder which hosting provider I eventually chose, it’s Cloudways. Ta-da!
So, take it away, Saud!
Set Up WooCommerce
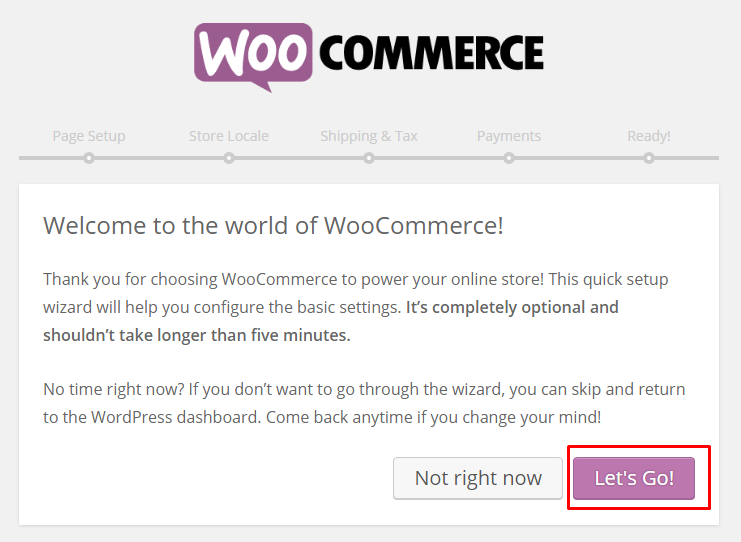
Once you have installed WooCommerce, you can run the Setup Wizard to be automatically directed to the WooCommerce configuration settings page. Click “Let’s Go”.
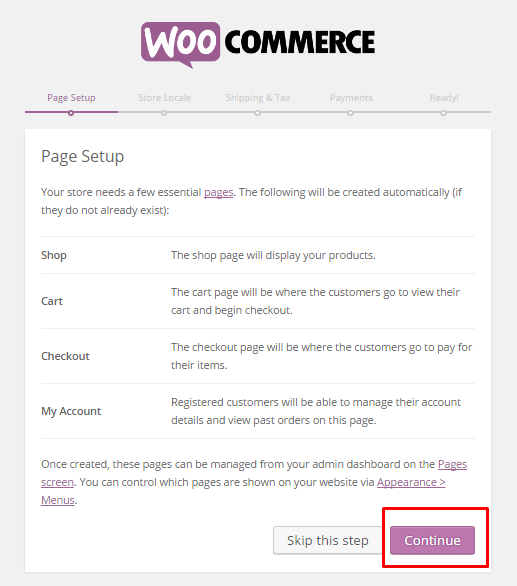
You will be directed to the page setup screen. Page setup is essential for your ecommerce website as it creates the essential pages automatically.
There are four different types of pages created, which are listed in the image below. All you need to do is click “Continue.”
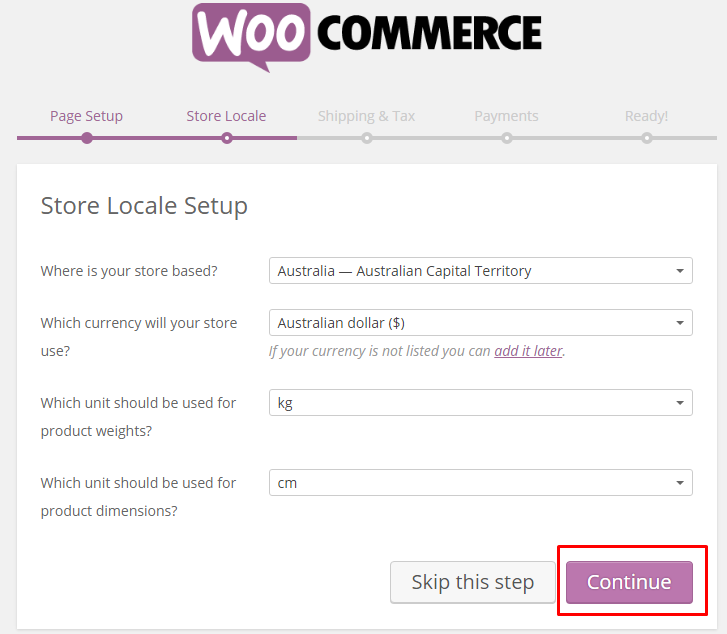
After the page setup, you have to set your Store Locale depending on the locality and currency in which you want the store to sell. Other options may include setting up product dimensions such as the length and weight of the product.
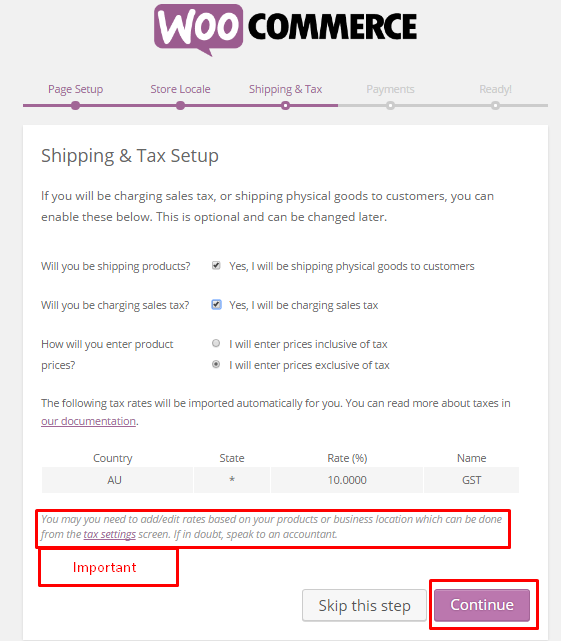
After setting up Store Locale information, the next step is setting Shipping & Tax information. Here you have to select options such as whether you will be shipping the products or not. Will you be adding sales tax? And how you will be entering the product price rates?
Once your options are selected, click “Continue”.
The payment section of your WooCommerce store allows you to accept both online and offline payments. Extra installment techniques can be introduced later and observed from the checkout settings screen. I for one propose entering PayPal so you have something to begin. Other options include bank transfers, checks, COD, and Stripe credit card gateway.
If you need to get more data about WooCommerce installment settings, check out the following link woocommerce-settings-and-options.
Once you are done with setting up your WooCommerce store configuration settings you will be provided with the following two options: “make your first item” or “Come back to the WordPress Dashboard.”

Set Up Your Online Store Format
First things first. Go to the new WooCommerce store at Dashboard>WooCommerce>Settings>Products to adjust Shop and Product Pages settings
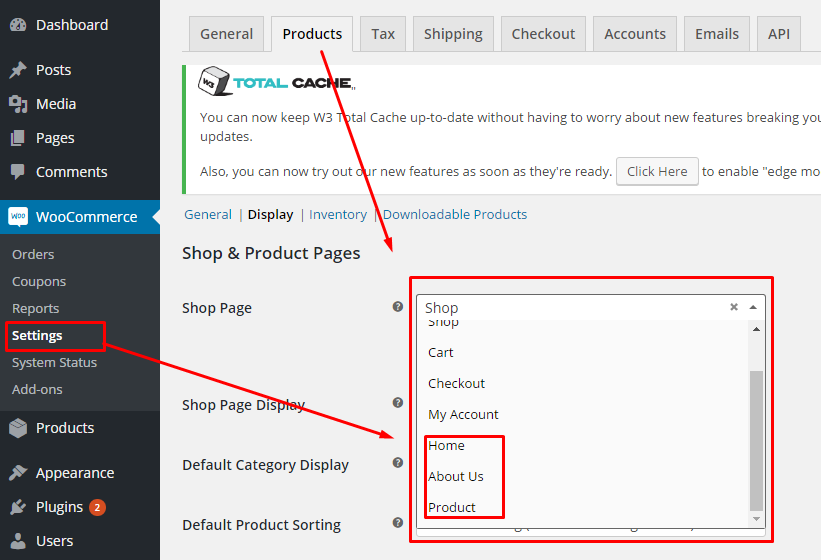
You can change the permalink of the shop page. For instance, instead of “Shop” it could be “T-Shirts” for a T-shirt store. That’s the archive page where all of your items will appear.
These settings control the permalinks used specifically for products.
Add New Products
Go to Products> New Product on your Dashboard navigation. These are the pages that will link to your Shop page.
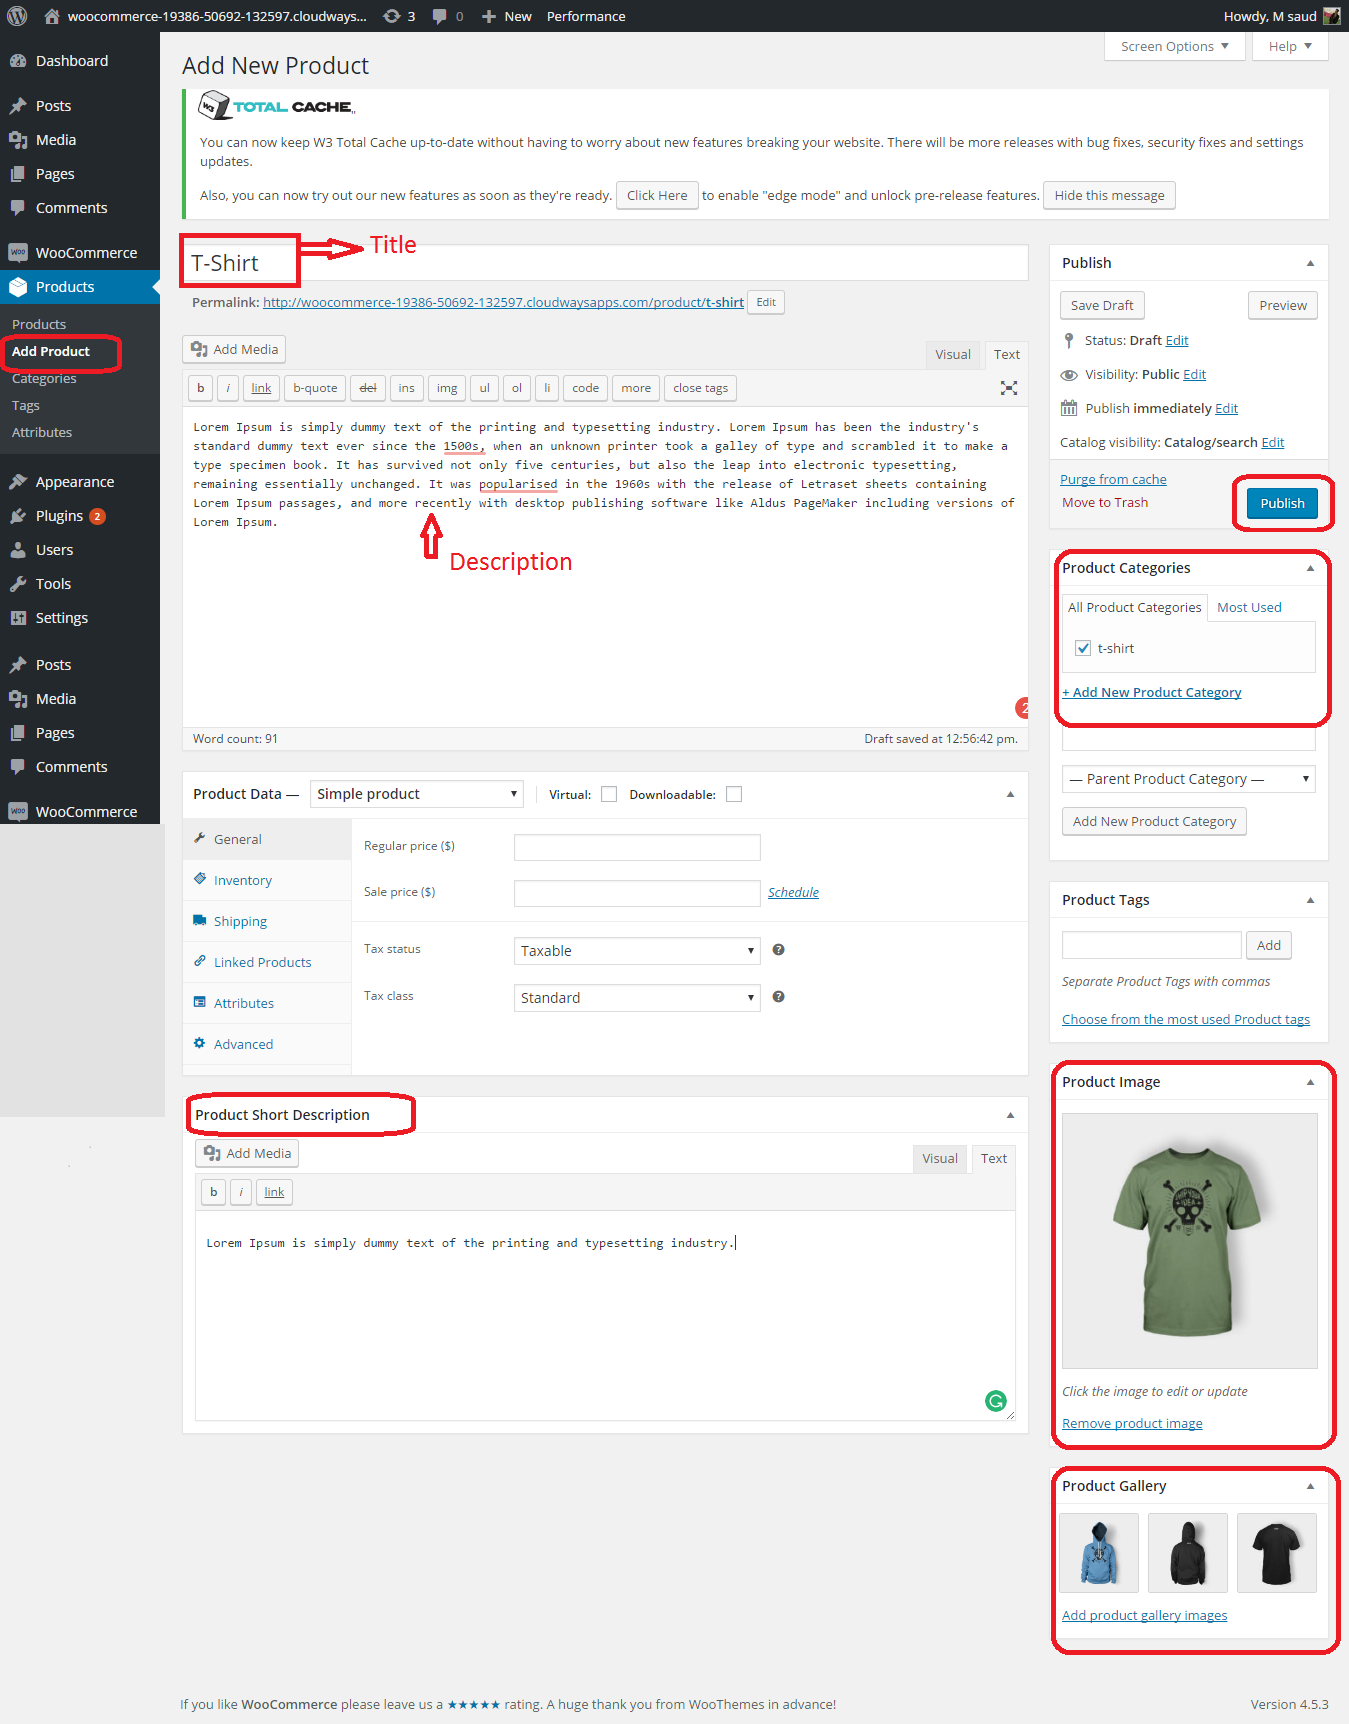
Product Description: Scroll down and put details that will be attached to the product in the Product (Short) Description box
Product Data: This is where you’ll add information such as Price, Tax Status, Inventory, Shipping, and more.
Product Categories: Self-explanatory, but you can add them straight from the product page.
Product Tags: Add further categorization that doesn’t want to be a product (like colors, etc.)
Product Gallery: Images that appear as thumbnails on the product page. As the shopper clicks on them, they cycle to display the “huge” featured image.
Product Image: You need to set it in Feature Image.
Note – You can place more information about the product in the regular Edit box.
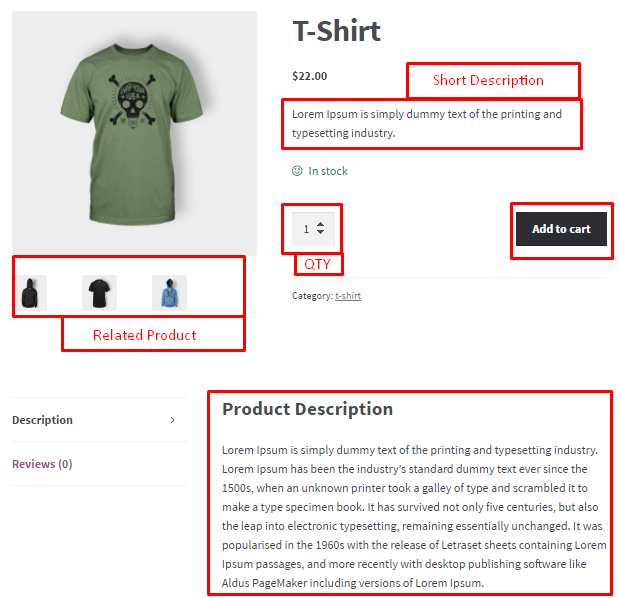
Now you can see the result after publishing your new product.
Last Words
So that’s all folks, I have tried my best to keep things simple and to the point.
Setting up your own online Ecommerce platform can be a hefty task. However, WordPress with WooCommerce makes it a lot easier. If there is anything that we missed or you have an opinion to share, feel free to do so in the comments section below.
Saud Razzak is the WordPress Community Manager at Cloudways. You can follow him on Twitter.
And if you liked this post, please share it with your friends and subscribe to Blogsite Studio to get the free ebook, Escalate Your WordPress Website. Cheers!