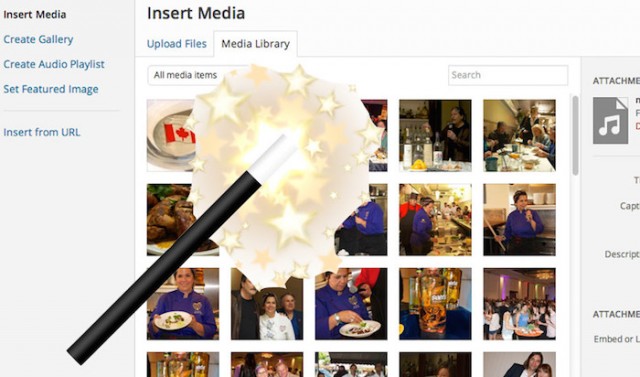
The WordPress Media Manager lets you to manage your photos like a magician pulls rabbits from a hat. This feature is so powerful, it makes other photo plugins obsolete and it keeps all your files in the Media Library where they won’t be upset by an update.
Here’s how you can make the Media Manager present your images in the best possible way.
Size Photos Pre-Upload
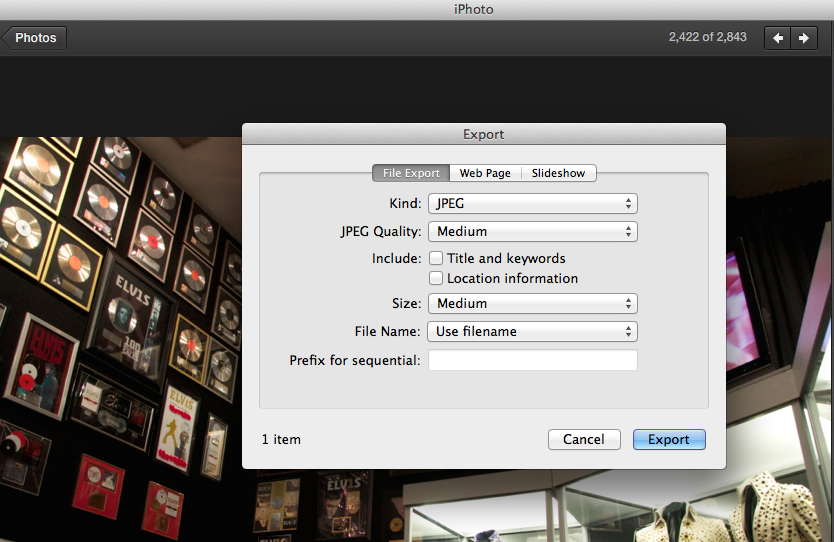 While the Media Manager can work its magic in many ways, it can’t make a large-sized image smaller on your server. So, to avoid slowing down your site, make sure to size your images appropriately before uploading them. Format images in the smallest possible physical size, file size, resolution, and file type
- Use Photoshop or iPhoto to crop and size your images to around 600 x 400 pixels, or 30 kb or less. 1000 pixels max is what I suggest.
- For fixed sized elements like sliders, conform to the exact measurements the theme or plugin calls for. If the theme doesn’t offer that in it’s documentation, use a developer tool like Chrome Tools to grab the size.
- Make sure your resolution is set at 72 dpi, unless you need a higher resolution such as for screenshots of text.
- File types for photos are either jpeg, jpg, or png. Png has higher resolution, but may not be supported on all browsers. For graphics, use a gif.
Then, hit the Add Media button in the Edit box and upload your photos by either dragging and dropping, or browsing.
 SEO Optimize
To be found by search engines, you want the images to lead visitors to your site. So it’s a good idea to optimize each image for SEO.
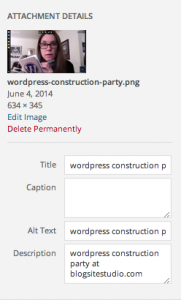
- In Edit Media, insert keyword-rich words in the Title, Caption, Alt Text, and Description.
- In addition to focus keywords, put a link to your site in the Alt Text and Description.
- If you have WordPress SEO by Yoast activated, you can go to the Media Library, click on the image, and use Yoast to optimize the image.
Choose Image Type
In the Media Manager, you’ll get a window with a gallery of large thumbnails in the middle. On the left is a menu for Insert Media, Create Gallery, Set Featured Image and Insert from URL.
- Insert Image is for inserting the image on the page, which is where the images stays.
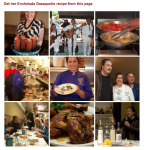
- Create New Gallery allows you to click numerous images without holding down the Shift key. Thumbnails at the bottom display images you’ve chosen. Hitting Create New Gallery offers a second window with settings: Link To, Columns Order, as well as Type, which pulls down to 2 options: by default it’s Grid Style and Slideshow. With Jetpack’s Tiled Galleries plugin activated you’ll also get Tiled Mosaic, Square Tiles and Circles.
- Set Featured Image uses the same Attachment Details as Insert Image. Since featured images need to be big, the image must be set to the largest size. But to check the image size you have to switch back to Insert Media mode to change that setting. Featured images follow your post around the site, acting as the post’s book cover.
- Insert From URL I cannot figure out and have never had a use for it.
- Create Audio Playlist is new with WordPress 3.9 but only appears when you upload audio files.
- Insert Video also only appears with an upload, but why would you want to upload gigantic video files when there is YouTube and Vimeo?
Insert Image offers the most Attachment Details options. It exclusively includes the Attachment Display Settings of Alignment, Link To and Size. On the right side of the Media Manager is the Attachment Details panel where you entered the Title, Caption, Alt Text, and Description.
On the Edit Page
Not only can we drag and drop an image onto the Edit Page, which automatically kicks it into the media library for upload, we can also resize the image once it’s inserted onto the page!

Once an image is placed on the Edit Page, clicking on the pencil icon opens a window called Image Details where the settings live. However, version 3.9 did away with settings for Borders and Margins, found under Attachment Options, so you should install the plugin Advanced Image Styles to give you back these settings.
PDFs in Media Manager
You can upload PDFs in Media Manager to have readers click to read or download them. What I do is post an image and link the uploaded PDF to it. Either in the Media Manager Attachment Options or the Image Details window under Display Settings, link to the PDF through Custom Link to the file’s link. To get the correct link you’ll unfortunately need to navigate to the Media Library to copy the link formatted as “http://yoursite.com/wp-content/uploads/2013/11/your-file.pdf.” Maybe that annoyance will change in version 4.0.
Audio Playlists
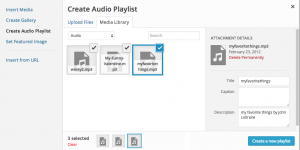
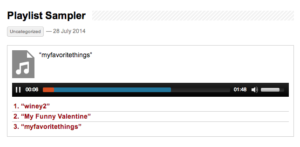
Media Manager will also create an audio playlist for you so that’s one other plugin you won’t need. Just upload mp3 files, click on Create Audio Playlist, select your files, and when you hit Create A Playlist you’re given options to Show Tracklist, Show Artist Name in Tracklist, and Show Images. Once inserted, the Playlist appears as an empty box, unlike the Image Gallery. So don’t be dismayed. Check how it looks in Preview, in the above case without images attached to each file.
Video – Meh
As for using Media Manager to insert videos: meh! Unless it’s a 10 second video, it will be too large to upload to your server and not worth its weight in megabytes. Better to embed a link to YouTube or any other service.
So now that you know the tricks to using Media Manager, you can make your site a magical place to visit. After all, behind compelling headlines, great visuals are the number one reason people will click on a link to your site and stay there to read the whole story.
Have you replaced other plugins by using Media Manager? What do you like better or appreciate less? I’d love to know how it works for you.